nginx学习记录--前端配置nginx实现跨域
前端配置nginx实现跨域
前言:以前做过jsonp实现跨域,不过这种需要服务端配合。现在的前端项目,比如vue,react等,在配置项目的脚手架中就带有跨域设置,也可以自己写一个node服务来跨域,今天来简单学习一下用nginx来实现跨域。
1.什么是nginx
nginx是一个高性能的HTTP和反向代理服务器,也是一个IMAP/POP3/SMTP代理服务器。 nginx的作用是:反向代理,负载均衡。其特点是占有内存少,并发能力强。
2.nginx安装
2-1 windows版:
nginx下载地址:http://nginx.org/en/download.html
nginx官网提供了三个类型的版本:
- Mainline version:Mainline 是 Nginx 目前主力在做的版本,可以说是开发版 .
- Stable version:最新稳定版,生产环境上建议使用的版本
- Legacy versions:遗留的老版本的稳定版
建议使用稳定版。下载之后解压,解压路径中尽量不要有中文,实际上各种环境配置,软件安装等目录尽量都不要用中文,因为中英文字符编码不一样。
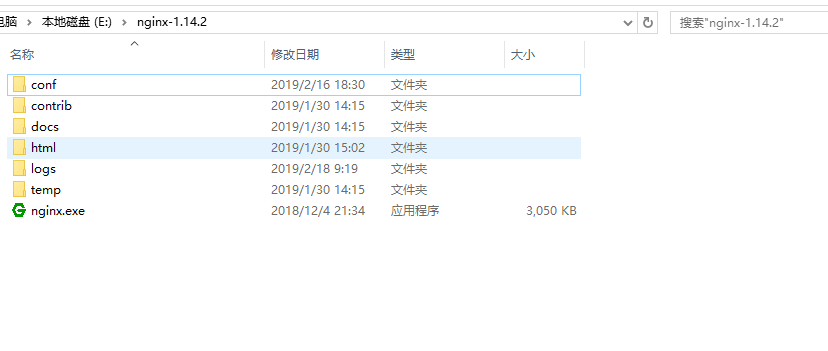
解压之后的目录就是这样
windows中常用的操做命令,一下命令全在上面根目录进行,用系统自带命令行,比如cmd。
1.启动nginx。实际上点击nginx.exe也能打开nginx,但是不容易关闭,需要到任务管理器中找到相关服务强行停止掉,建议使用下面命令行开启服务。
start nginx
nginx默认使用80端口,如果电脑中有其他服务占用了80端口,修改nginx使用的端口即可。
server {
 listen  80;  // 这里改成其他的,比如8082
 server_name localhost;
}
2.重启nginx,修改nginx配置之后就需要重启一下
nginx -s reload
3.停止nginx。建议使用后面那种停止方式
 nginx -s stop
 nginx -s quit
nginx停止命令stop与quit参数的区别在于stop是快速停止nginx,可能并不保存相关信息,quit是完整有序的停止nginx,并保存相关信息。nginx启动与停止命令的效果都可以通过Windows任务管理器中的进程选项卡观察。
4.其他nginx命令(一般很少用到)
-?,-h           : 打开帮助信息
-v              : 显示版本信息并退出
-V              : 显示版本和配置选项信息,然后退出
-t              : 检测配置文件是否有语法错误,然后退出
-q              : 在检测配置文件期间屏蔽非错误信息
-s signal       : 给一个 nginx 主进程发送信号:stop(停止), quit(退出), reopen(重启), reload(重新加载配置文件)
-p prefix       : 设置前缀路径(默认是:/usr/local/Cellar/nginx/1.2.6/)
-c filename     : 设置配置文件(默认是:/usr/local/etc/nginx/nginx.conf)
-g directives   : 设置配置文件外的全局指令
2-2 mac版
1.打开终端,安装Command Line tools ,基本上应该都安装过这个,可以跳过
xcode-select --install
2.安装brew命令
ruby -e "$(curl -fsSL https://raw.githubusercontent.com/Homebrew/install/master/install)"
3.安装nginx
brew install nginx
4.启动nginx
sudo nginx
5.mac版nginx命令,基本上和windows差不多
sudo nginx   // 启动
sudo -s reload  // 重启
sudo -s quit  // 停止
sudo -s stop   // 停止
6.nginx安装目录
open /usr/local/etc/nginx/
3.nginx配置
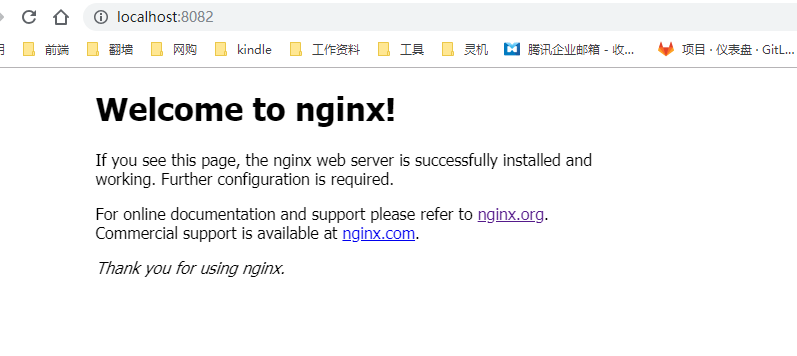
nginx启动之后,访问http://localhost:8082/,因为我修改了nginx的默认端口为8082。
3-1 配置详解
我们先看一下nginx的默认配置,在conf文件夹中,找到nginx.conf文件。在我这路径为E:\nginx-1.14.2\conf\nginx.conf
#user  nobody;
worker_processes  1;

#error_log  logs/error.log;
#error_log  logs/error.log  notice;
#error_log  logs/error.log  info;

#pid        logs/nginx.pid;


events {
    worker_connections  1024;
}


http {
    include       mime.types;
    default_type  application/octet-stream;

    #log_format  main  '$remote_addr - $remote_user [$time_local] "$request" '
    #                  '$status $body_bytes_sent "$http_referer" '
    #                  '"$http_user_agent" "$http_x_forwarded_for"';

    #access_log  logs/access.log  main;

    sendfile        on;
    #tcp_nopush     on;

    #keepalive_timeout  0;
    keepalive_timeout  65;

    #gzip  on;

    server {
        listen       80;
        server_name  localhost;

        #charset koi8-r;

        #access_log  logs/host.access.log  main;

        location / {
            root   html;
            index  index.html index.htm;
        }

        #error_page  404              /404.html;

        # redirect server error pages to the static page /50x.html
        #
        error_page   500 502 503 504  /50x.html;
        location = /50x.html {
            root   html;
        }

        # proxy the PHP scripts to Apache listening on 127.0.0.1:80
        #
        #location ~ \.php$ {
        #    proxy_pass   http://127.0.0.1;
        #}

        # pass the PHP scripts to FastCGI server listening on 127.0.0.1:9000
        #
        #location ~ \.php$ {
        #    root           html;
        #    fastcgi_pass   127.0.0.1:9000;
        #    fastcgi_index  index.php;
        #    fastcgi_param  SCRIPT_FILENAME  /scripts$fastcgi_script_name;
        #    include        fastcgi_params;
        #}

        # deny access to .htaccess files, if Apache's document root
        # concurs with nginx's one
        #
        #location ~ /\.ht {
        #    deny  all;
        #}
    }


    # another virtual host using mix of IP-, name-, and port-based configuration
    #
    #server {
    #    listen       8000;
    #    listen       somename:8080;
    #    server_name  somename  alias  another.alias;

    #    location / {
    #        root   html;
    #        index  index.html index.htm;
    #    }
    #}


    # HTTPS server
    #
    #server {
    #    listen       443 ssl;
    #    server_name  localhost;

    #    ssl_certificate      cert.pem;
    #    ssl_certificate_key  cert.key;

    #    ssl_session_cache    shared:SSL:1m;
    #    ssl_session_timeout  5m;

    #    ssl_ciphers  HIGH:!aNULL:!MD5;
    #    ssl_prefer_server_ciphers  on;

    #    location / {
    #        root   html;
    #        index  index.html index.htm;
    #    }
    #}

}
上面文件,简单点说就是
main
      events   {
        ....
      }
      http        {
        ....
        upstream myproject {
          .....
        }
        server  {
          ....
          location {
              ....
          }
        }
        server  {
          ....
          location {
              ....
          }
      }
      ....
1.main(全局设置) 。主要控制nginx子进程的所属用户/用户组、派生子进程数、错误日志位置/级别、pid位置、子进程优先级、进程对应cpu、进程能够打开的文件描述符数目等。
2.events(nginx工作模式) 。控制nginx处理连接的方式
3.http(http设置) 。是nginx处理http请求的主要配置模块,大多数配置都在这里面进行。
4.sever(主机设置) 。是nginx中主机的配置块,可以配置多个虚拟主机。
5.location(URL匹配) 。是server中对应的目录级别的控制块,可以有多个。
6.upstream(负载均衡服务器设置) 。是nginx做反向代理和负载均衡的配置块,可以有多个。
3-1实战练习
下面我们用豆瓣api V2开放接口来做实验。
接口地址:http://api.douban.com/v2/movie/top250?start=25&count=25
axios请求:
axios.get({
    method:'get',
    url:"/v2/movie/top250?start=25&count=25"
}).then((res)=>{
    console.log(res.data)
})
或者使用jquery
$.get("/v2/movie/top250?start=25&count=25", function(data){
    console.log(data);
})
要实现跨域,只需要简单修改几个设置。
1.修改默认配置,大概在35行,80端口改为8082,当然,其他数字也可以,只要是未被占用的端口
listen 80;
2.反向代理到webpack-server服务
默认代理服务为
 location / {
            root   html;
            add_header Cache-Control no-store;
            add_header 'Access-Control-Allow-Origin' '*';
            index  index.html index.htm;
        }
修改为下面这样,建议注释掉上面部分,新增下面这部分内容。
     location / {
             # 反向代理到webpack-server服务
             proxy_pass http://127.0.0.1:8081;
        }
这个匹配规则是,匹配到路由中有/的部分就代理到http://127.0.0.1:8081,相当于全局匹配。。
然后我们在nginx配置文件中,新增一条配置
  server {
      location ^~ /v2/movie {
                proxy_pass http://api.douban.com;
            }
        }
这里个规则是匹配到 /v2/movie路由之后,重定向到http://api.douban.com
这里需要注意一点,proxy_pass这里,http://api.douban.com和http://api.douban.com/是不一样的。
- 不加
/的情况,访问http://10.1.70.229:8082/v2/movie/v2/movie/top250?start=25&count=25会得到http://api.douban.com/v2/movie/top250?start=25&count=25(符合预期的) - 加/的情况,访问
http://10.1.70.229:8082/v2/movie/v2/movie/top250?start=25&count=25会得到http://api.douban.com/top250?start=25&count=25(不符合预期)
下面两种配置效果是一样的。
location ^~ /v2/movie {
                proxy_pass http://api.douban.com;
            }
或
   location ^~ /v2/movie {
            proxy_pass http://api.douban.com/v2/movie/;
        }
针对这种情况,如果后端接口统一有了规定前缀,比如/api,那你这里就不要配置斜杠了。另一种情况,后端接口shit一样,没有统一前缀,这边又要区分,那就在前端所有接口都加一个统一前缀,比如/api,然后通过加斜杠来替换掉好了~
删掉多余注释代码,整个nginx.conf文件配置如下。
worker_processes  1;

events {
    worker_connections  1024;
}

http {
    include       mime.types;

    default_type  application/octet-stream;

    sendfile        on;

    keepalive_timeout  65;

    server {
        listen       8082;
        server_name  gwg.localhost;

        location / {
             # 反向代理到webpack-server服务
             proxy_pass http://127.0.0.1:8081;
        }

        # 匹配豆瓣api
        location ^~ /v2/movie {
            # rewrite ^/v2/movie/(.*)$ /$1 break;
            proxy_pass http://api.douban.com;
        }

        # 匹配到错误之后的处理页
        error_page   500 502 503 504  /50x.html;
        location = /50x.html {
            root   html;
        }

    }

}
3-3 rewrite
rewrite功能就是,使用nginx提供的全局变量或自己设置的变量,结合正则表达式和标志位实现url重写以及重定向。rewrite只能放在server{},location{},if{}中,并且只能对域名后边的除去传递的参数外的字符串起作用,例如 http://seanlook.com/a/we/index.php?id=1&u=str 只对/a/we/index.php重写。语法rewrite regex replacement [flag];
如果相对域名或参数字符串起作用,可以使用全局变量匹配,也可以使用proxy_pass反向代理。
表明看rewrite和location功能有点像,都能实现跳转,主要区别在于rewrite是在同一域名内更改获取资源的路径,而location是对一类路径做控制访问或反向代理,可以proxy_pass到其他机器。很多情况下rewrite也会写在location里,它们的执行顺序是:
- 执行server块的rewrite指令
- 执行location匹配
- 执行选定的location中的rewrite指令
如果其中某步URI被重写,则重新循环执行1-3,直到找到真实存在的文件;循环超过10次,则返回500 Internal Server Error错误。
还是使用豆瓣的接口
接口地址:http://api.douban.com/v2/movie/top250?start=25&count=25
在js中这样访问,注意多了 /api 部分
$.get("/api/v2/movie/top250?start=25&count=25", function(data){
    console.log(data);
})
配置中的location修改为
 location ^~ /api/ {
            rewrite ^/api/(.*)$ /$1 break;
            proxy_pass http://api.douban.com/;
        }
这里解释为:匹配到请求路径中包含 /api/部分时候,将/api/这部分替换为http://api.douban.com/
也就是说请求的是http://10.1.70.229:8082/api/v2/movie/top250?start=25&count=25,实际上已经代理到http://api.douban.com/api/v2/movie/top250?start=25&count=25,得到了接口的数据
3-4 location
自出引用自 https://segmentfault.com/a/1190000002797606#articleHeader0
语法规则: location [=|~|~*|^~] /uri/ { … }
= 开头表示精确匹配
^~ 开头表示uri以某个常规字符串开头,理解为匹配 url路径即可。nginx不对url做编码,因此请求为/static/20%/aa,可以被规则^~ /static/ /aa匹配到(注意是空格)。
~ 开头表示区分大小写的正则匹配
~* 开头表示不区分大小写的正则匹配
!~和!~*分别为区分大小写不匹配及不区分大小写不匹配 的正则
/ 通用匹配,任何请求都会匹配到。
多个location配置的情况下匹配顺序为(参考资料而来,还未实际验证,试试就知道了,不必拘泥,仅供参考):
首先匹配 =,其次匹配^~, 其次是按文件中顺序的正则匹配,最后是交给 / 通用匹配。当有匹配成功时候,停止匹配,按当前匹配规则处理请求。
location = / {
   #规则A
}
location = /login {
   #规则B
}
location ^~ /static/ {
   #规则C
}
location ~ \.(gif|jpg|png|js|css)$ {
   #规则D
}
location ~* \.png$ {
   #规则E
}
location !~ \.xhtml$ {
   #规则F
}
location !~* \.xhtml$ {
   #规则G
}
location / {
   #规则H
}
那么产生的效果如下:
访问根目录/, 比如http://localhost/ 将匹配规则A
访问 http://localhost/login 将匹配规则B,http://localhost/register 则匹配规则H
访问 http://localhost/static/a.html 将匹配规则C
访问 http://localhost/a.gif, http://localhost/b.jpg 将匹配规则D和规则E,但是规则D顺序优先,规则E不起作用,而 http://localhost/static/c.png 则优先匹配到 规则C
访问 http://localhost/a.PNG 则匹配规则E, 而不会匹配规则D,因为规则E不区分大小写。
访问 http://localhost/a.xhtml 不会匹配规则F和规则G,http://localhost/a.XHTML不会匹配规则G,因为不区分大小写。规则F,规则G属于排除法,符合匹配规则但是不会匹配到,所以想想看实际应用中哪里会用到。
访问 http://localhost/category/id/1111 则最终匹配到规则H,因为以上规则都不匹配,这个时候应该是nginx转发请求给后端应用服务器,比如FastCGI(php),tomcat(jsp),nginx作为方向代理服务器存在。
暂时就了解到这里了,后续有机会再次学习…….