hexo搭建个人博客
1.什么是 Hexo?
Hexo 是一个快速、简洁且高效的博客框架。Hexo 使用 Markdown(或其他渲染引擎)解析文章,在几秒内,即可利用靓丽的主题生成静态网页。
2.安装hexo
# 安装hexo
npm install hexo-cli g

# 初始化博客文件夹
hexo init blog

# 切换到该路径
cd blog

# 安装hexo的扩展插件
npm install

# 安装其它插件
npm install hexo-server --save
npm install hexo-admin --save
npm install hexo-generator-archive --save
npm install hexo-generator-feed --save
npm install hexo-generator-search --save
npm install hexo-generator-tag --save
npm install hexo-deployer-git --save
npm install hexo-generator-sitemap --save
3.建站过程
初始化( <folder>表示文件夹名字)
hexo init <folder>

cd <folder>

安装依赖
npm install
目录结构如下
.
├── _config.yml
├── package.json
├── scaffolds
├── source
|   ├── _drafts
|   └── _posts
└── themes
_config.yml
网站的 配置 信息,您可以在此配置大部分的参数。
package.json
应用程序的信息。EJS, Stylus 和 Markdown renderer 已默认安装,您可以自由移除。
scaffolds
模版 文件夹。当您新建文章时,Hexo 会根据 scaffold 来建立文件。
Hexo的模板是指在新建的markdown文件中默认填充的内容。例如,如果您修改scaffold/post.md中的Front-matter内容,那么每次新建一篇文章时都会包含这个修改。
source
资源文件夹是存放用户资源的地方。除 _posts 文件夹之外,开头命名为 _ (下划线)的文件 / 文件夹和隐藏的文件将会被忽略。Markdown 和 HTML 文件会被解析并放到 public 文件夹,而其他文件会被拷贝过去。
themes
主题 文件夹。Hexo 会根据主题来生成静态页面。
下面以next主题为例介绍这么搭建个人博客
4.next主题使用教程
Hexo 安装主题的方式非常简单,只需要将主题文件拷贝至站点目录的 themes 目录下, 然后修改下配置文件即可。具体到 NexT 来说,安装步骤如下。
在根目录下执行下面命令,将会在themes文件夹下下载next主题
git clone https://github.com/iissnan/hexo-theme-next themes/next

也可以直接下载主题包
前往 NexT 版本 发布页面https://github.com/iissnan/hexo-theme-next/releases,下载主题包放在themes文件夹下面,并将主题文件夹命名为next(任何名字都可以,主要为了和后面一致)
打开站点配置文件_config.yml中设置theme: next
4-1启动hexo
1.第一种方式:直接运行
hexo s

2.保险一点,先清除缓存再启动服务
hexo clean && hexo s
这时候会提示
INFO Hexo is running at http://0.0.0.0:4000/. Press Ctrl+C to stop.
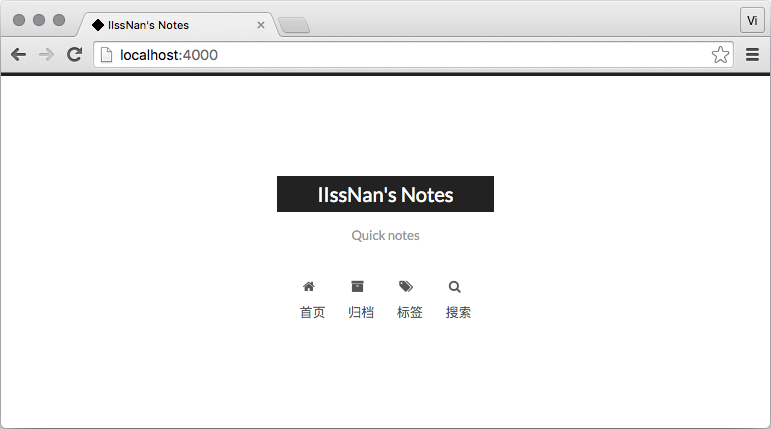
打开浏览器访问:localhost:4000即可看到启动页
5.案例
下面以material主题为例介绍我的配置过程
5.1 安装Materia
- 方法一:git clone
cd themes
git clone https://github.com/viosey/hexo-theme-material.git
在我实测中,这种方法没有成功,应该是我本身的网络问题。这时候我使用了第二种方法
- 方法二:使用npm安装
npm install hexo-material
安装完毕后,首先在 hexo 目录下的 themes 文件夹中新建一个文件夹 material ,之后在 hexo 目录下的 node_modules 文件夹中找到 hexo-material 文件夹,然后把里面的全部文件复制到 materia 文件夹里。
注意!!! 需要将 materia 主题下的配置文件 _config.template.yml 重命名为 _config.yml。 然后打开站点配置文件(根目录的 _config.yml文件),查找 theme 参数并修改为 materia
theme: material
这时候运行
hexo s
即可进行预览
5.2配置主题
在主题文件夹material文件夹中修改配置。贴出部分配置的介绍
Material 主题配置文件(节选)# Head info
head:
    favicon: "/img/favicon.png" #网站的 favicon
    high_res_favicon: "/img/favicon.png"  #高清 favicon
    apple_touch_icon: "/img/favicon.png" #iOS 主屏按钮图标
    keywords: blog web 前端 #网站关键词
url:
    rss:   #设置生成的 rss 或 atom url
    daily_pic: "https://zhouxiaoyu1994.github.io/FCC2017/resume/index.html"  #设置 daily_pic 模块 点击时跳转的 url
    logo: "https://github.com/zhouxiaoyu1994"  #设置 logo 点击时跳转的 url
scheme: Paradox #主题外观(默认)
uiux:
    slogan: "前端作品集"  #显示在 blog_info 模块中的标语,你可以设置单行标语或者多行标语:
    theme_color: "#0097A7"  #主题主要颜色。主题的大部分地方使用此颜色。
    theme_sub_color: "#00838F" #主题辅助颜色。
    hyperlink_color: "#00838F" #超链接颜色。
    button_color: "#757575" #按钮颜色,例如 toTop 或 menu_button。
    android_chrome_color: "#0097A7" #安卓 Chrome 浏览器的地址栏颜色。
    nprogress_color: "#29d" #页面加载时顶部加载进度条的颜色。
    nprogress_buffer: "800" #页面加载时顶部加载进度条的缓冲时间。
5.3添加站点搜索功能
使用本地搜索需要安装 hexo-generator-search 插件。 这个插件生成Hexo 3.0的搜索数据。此插件用于生成搜索索引文件,其中包含您可以用来为您的博客编写本地搜索引擎的文章的所有必要数据。支持XML和JSON格式输出。
然后在 站点配置文件中添加
search:
path: search.xml
field: all
然后根目录运行下面命令,将在公共文件夹中获取生成的结果。
hexo g
6.写作与发布
6-1新建博客
hexo new '新建博客'
这时候会在 ./source./_posts 路径里面有个叫‘新建博客’的md文件和文件夹,文件夹是用来放静态资源
6-2 发布
- 1.安装hexo-deployer-git
npm install hexo-deployer-git --save
- 2.在站点配置文件里面配置git仓库地址
deploy:
  type: git
  repository: https://github.com/terry-guo/terry-guo.github.io.git
  branch: master
- 3.部署到github
hexo d -g发布
目前只是初步形态,后续将会继续优化,完善各方面功能。
7、拓展功能
7-1加一个动态背景效果
在material主题文件的layout文件夹中的index.ejs和post.ejs中引入这样一段代码
 <script>
            //背景线条
            !function(){function n(n,e,t){return n.getAttribute(e)||t}function e(n){return document.getElementsByTagName(n)}function t(){var t=e("script"),o=t.length,i=t[o-1];return{l:o,z:n(i,"zIndex",-1),o:n(i,"opacity",.5),c:n(i,"color","0,0,0"),n:n(i,"count",99)}}function o(){a=m.width=window.innerWidth||document.documentElement.clientWidth||document.body.clientWidth,c=m.height=window.innerHeight||document.documentElement.clientHeight||document.body.clientHeight}function i(){r.clearRect(0,0,a,c);var n,e,t,o,m,l;s.forEach(function(i,x){for(i.x+=i.xa,i.y+=i.ya,i.xa*=i.x>a||i.x<0?-1:1,i.ya*=i.y>c||i.y<0?-1:1,r.fillRect(i.x-.5,i.y-.5,1,1),e=x+1;e<u.length;e++)n=u[e],null!==n.x&&null!==n.y&&(o=i.x-n.x,m=i.y-n.y,l=o*o+m*m,l<n.max&&(n===y&&l>=n.max/2&&(i.x-=.03*o,i.y-=.03*m),t=(n.max-l)/n.max,r.beginPath(),r.lineWidth=t/2,r.strokeStyle="rgba("+d.c+","+(t+.2)+")",r.moveTo(i.x,i.y),r.lineTo(n.x,n.y),r.stroke()))}),x(i)}var a,c,u,m=document.createElement("canvas"),d=t(),l="c_n"+d.l,r=m.getContext("2d"),x=window.requestAnimationFrame||window.webkitRequestAnimationFrame||window.mozRequestAnimationFrame||window.oRequestAnimationFrame||window.msRequestAnimationFrame||function(n){window.setTimeout(n,1e3/45)},w=Math.random,y={x:null,y:null,max:2e4};m.id=l,m.style.cssText="position:fixed;top:0;left:0;z-index:"+d.z+";opacity:"+d.o,e("body")[0].appendChild(m),o(),window.onresize=o,window.onmousemove=function(n){n=n||window.event,y.x=n.clientX,y.y=n.clientY},window.onmouseout=function(){y.x=null,y.y=null};for(var s=[],f=0;d.n>f;f++){var h=w()*a,g=w()*c,v=2*w()-1,p=2*w()-1;s.push({x:h,y:g,xa:v,ya:p,max:6e3})}u=s.concat([y]),setTimeout(function(){i()},100)}();;

            </script>
这样页面背景中就多了一个线条跟随鼠标动的动态效果。至于要改变背景颜色图片什么的,就找到对应的标签去写样式覆盖。
7-2 加入Q版看板娘
参考这个
https://github.com/EYHN/hexo-helper-live2d/blob/master/README.zh-CN.md
安装模块
npm install --save hexo-helper-live2d
然后安装具体的模型(我比较喜欢这里面的2个)
npm install --save live2d-widget-model-shizuku
npm install --save live2d-widget-model-miku
然后在根目录的config.yml文件中加入下面一段
#萌萌哒的日本动漫图
live2d:
  model:
          #这里设置的use就是你要用的那个模型
      use: live2d-widget-model-shizuku
      #use: live2d-widget-model-miku
  display:
    position: right
    bottom: -60
    width: 120
    height: 240
  mobile:
    show: true